
Submitted ByEdit Dates
Date Uploaded: September 6, 2009, 10:04 pm Last Edited: December 22, 2012, 4:39 pm |
 Add to Add toSite Favourites Print this Article |
Jens Pind Linkage 5
Article © MAIL User: Aertaka
This is a tutorial for weaving Jens Pind Linkage 5. It is closely related to Jens Pind Linkage 3, the normal Jens Pind Linkage, but it is quite a bit more complicated. This tutorial uses a trick that I accidentally discovered, and hopefully will give lots of people success with this weave.
Now here's the trick. JPL 5 takes an AR of about 4.5 - 5. I had originally thought it took 14gauge 5/16" rings, and tried making it with those. It didn't work, because they have an AR of 4. However, after giving up with trying to start again with 16gauge 5/16" rings, I discovered I could continue the first weave, using the thinner rings.
Using the thicker rings in the beginning makes the start of the weave much more stable, and it is stable enough that by the time you have to switch to thinner rings, it holds together on its own.
On my first attempt, I started with 14gauge 5/16" rings, switched to 16gauge 5/16", then after deciding it was a bit loose for my tastes, I switched to 16gauge 9/32". If you have that size mandrel, great, otherwise 5/16" works ok too.
The other thing is, the pictures in this tutorial go straight from 14gauge 5/16" to 16gauge 9/32". It's simpler and can be done, but the first 5 rings or so in 9/32" are very hard to thread through because of the change of the Inside Diameter. If you're good at threading through tight rings, then that's the path for you. If not, go to 5/16" first, then switch to 9/32" after the chain loosens.
I also used Bright Aluminum, which doesn't have much springback. I don't know how other metals with different amounts of springback will work. Good luck experimenting.
One last warning. It's very easy to slip a ring through the wrong place in this weave, so be extremely careful that your rings are in the exact same layout as mine. Check everything. Pay especial attention to the position of the first 3 rings, it will help a lot.
===============
Alright, less with the talking, and more with the weaving.
Start by cutting 6 14gauge 5/16" rings. Close one, and open five. Make sure you very carefully arrange them in this layout:

:)
-----------------
Weave an open ring into the closed ring, like this:

-----------------
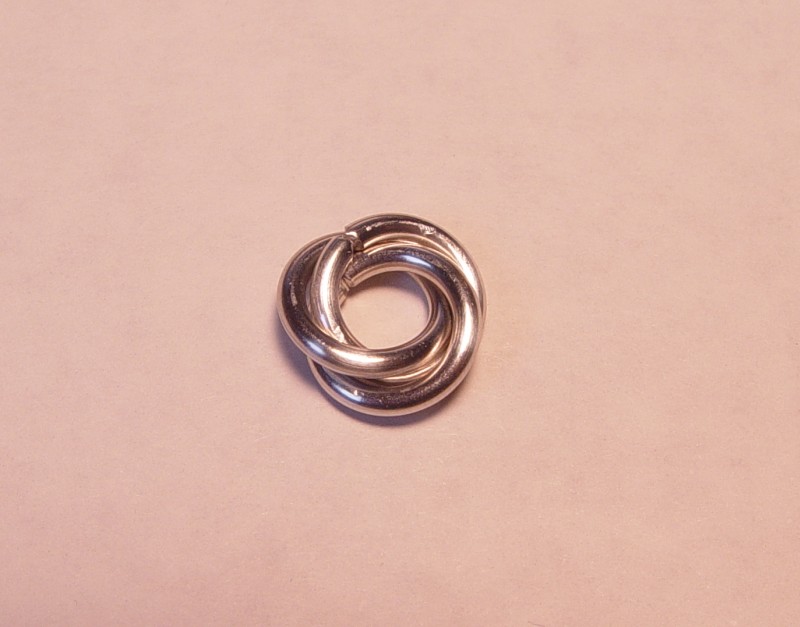
Weave a third ring through the first two to make a 3-ring Mobius Ball:
-----------------
This next picture is closer to the arrangement in which these rings will be in the actual chain. So arrange your rings to look like this:

-----------------
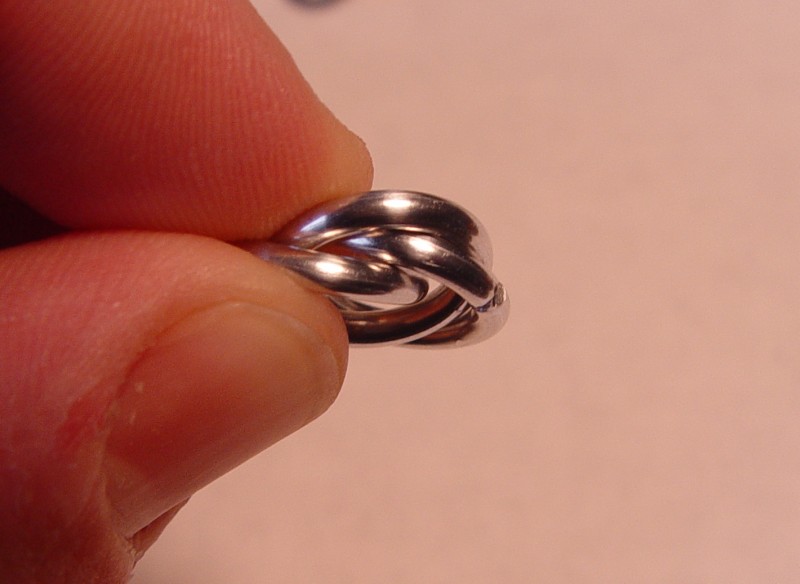
Now from here, scrunch up those three rings to look like this:
-----------------
Now when they're close together like that, if you look at them from the side you'll see that they share a common gap. Thread a ring through there:
-----------------
Now arrange your rings like this, and go from here...

-----------------
...To here...

-----------------
...And finally to here. Make sure the ring layout is exactly the same, this part is tricky:

-----------------
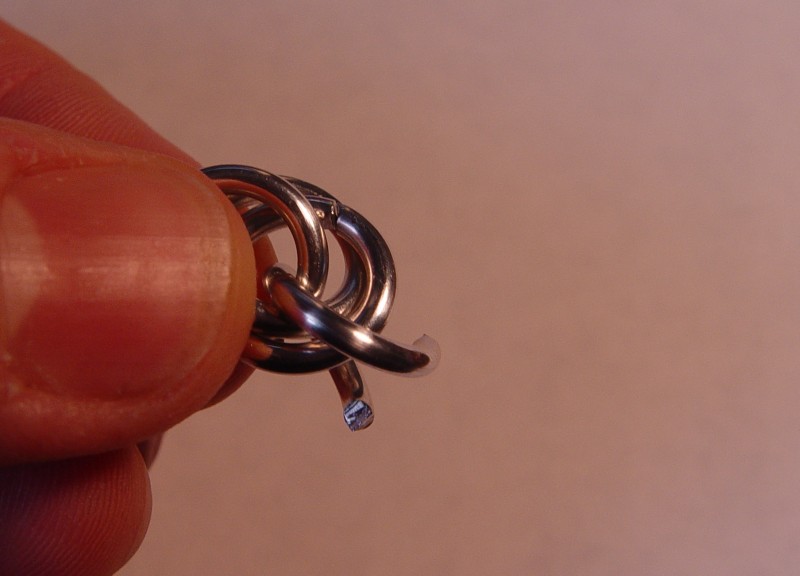
Now if you look at these four rings from the side, they share a common gap, just like the first three did. Thread a 5th ring through that gap:

-----------------
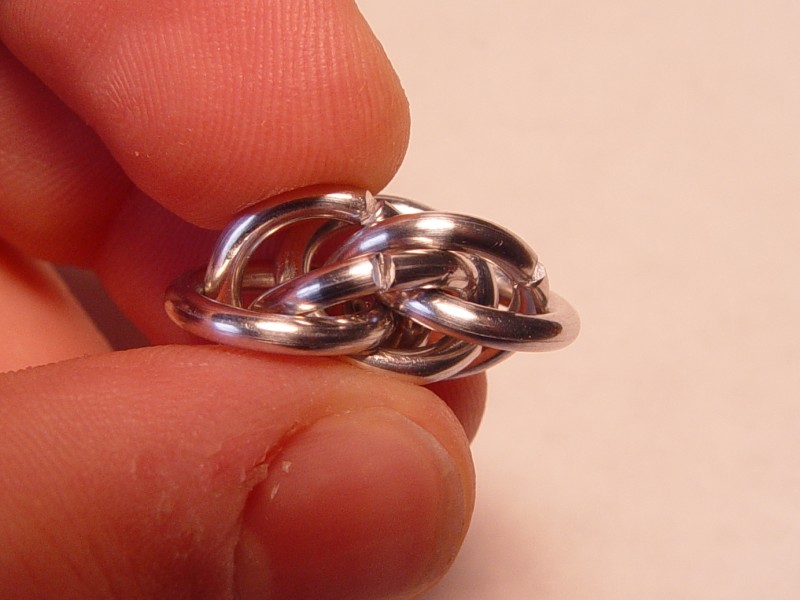
The weave should be starting to stabilize now. Now rotate the weave and scrunch it up like this next picture. Pay attention to the first few rings on the left, they're your landmarks. Make sure the angles at which they go through the other rings match the ones in the picture.
-----------------
Now, see that gap above the first ring, in the middle of the weave? Thread a ring through on top there. It should look like this:
-----------------
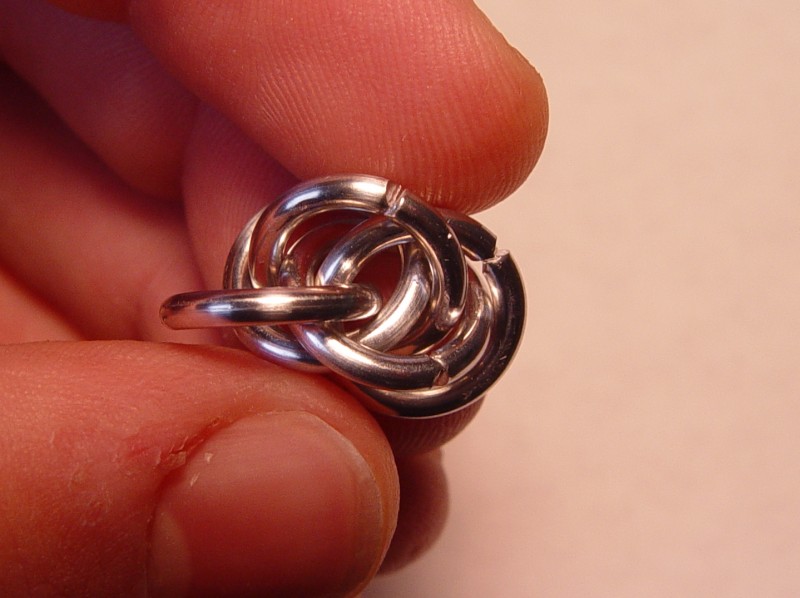
Here's a more clear view, which also shows the layout of all the other rings nicely as well. This is a good time to compare again and double-check everything. If you got it right, then you're putting in parallel rings from here on!. Also remember that from here on, each ring you put in will be threading through four (4) rings. Did I mention four? Count carefully.

-----------------
Now cut a bunch of 16gauge rings. As I said before, use 9/32" if you don't mind the weave being really tight at first. Otherwise use 5/16", because those will still work.

-----------------
Now for every step from here on, make sure the positions of the first ring and its parallel are matched with the ones in the pictures. Make sure the first parallel is on top of the original ring, then thread a thin ring in front of the original second ring, going through the last four rings:

-----------------
Now thread a ring under the original third ring. Remember to match the positions of the first ring and its parallel.

-----------------
Now thread a ring under the original fourth ring:

-----------------
Now in this next one, notice the positions of the first ring and its parallel. The first parallel is still on top of the first original ring. From here, thread a ring behind the original fifth ring:

-----------------
And that, ladies and gentlemen, is a complete section of the weave. From here on out, you're just matching parallels, and making sure you thread through four rings every time. To make sure you got the weave right, examine the weave while you rotate it. Each sequential row of parallels should slant in alternating directions.
If you have questions, feel free to ask in the forum or by PMing me, and I'll try to give you answers. Enjoy the weave!

Now here's the trick. JPL 5 takes an AR of about 4.5 - 5. I had originally thought it took 14gauge 5/16" rings, and tried making it with those. It didn't work, because they have an AR of 4. However, after giving up with trying to start again with 16gauge 5/16" rings, I discovered I could continue the first weave, using the thinner rings.
Using the thicker rings in the beginning makes the start of the weave much more stable, and it is stable enough that by the time you have to switch to thinner rings, it holds together on its own.
On my first attempt, I started with 14gauge 5/16" rings, switched to 16gauge 5/16", then after deciding it was a bit loose for my tastes, I switched to 16gauge 9/32". If you have that size mandrel, great, otherwise 5/16" works ok too.
The other thing is, the pictures in this tutorial go straight from 14gauge 5/16" to 16gauge 9/32". It's simpler and can be done, but the first 5 rings or so in 9/32" are very hard to thread through because of the change of the Inside Diameter. If you're good at threading through tight rings, then that's the path for you. If not, go to 5/16" first, then switch to 9/32" after the chain loosens.
I also used Bright Aluminum, which doesn't have much springback. I don't know how other metals with different amounts of springback will work. Good luck experimenting.
One last warning. It's very easy to slip a ring through the wrong place in this weave, so be extremely careful that your rings are in the exact same layout as mine. Check everything. Pay especial attention to the position of the first 3 rings, it will help a lot.
===============
Alright, less with the talking, and more with the weaving.
Start by cutting 6 14gauge 5/16" rings. Close one, and open five. Make sure you very carefully arrange them in this layout:
:)
-----------------
Weave an open ring into the closed ring, like this:
-----------------
Weave a third ring through the first two to make a 3-ring Mobius Ball:
-----------------
This next picture is closer to the arrangement in which these rings will be in the actual chain. So arrange your rings to look like this:
-----------------
Now from here, scrunch up those three rings to look like this:
-----------------
Now when they're close together like that, if you look at them from the side you'll see that they share a common gap. Thread a ring through there:
-----------------
Now arrange your rings like this, and go from here...
-----------------
...To here...
-----------------
...And finally to here. Make sure the ring layout is exactly the same, this part is tricky:
-----------------
Now if you look at these four rings from the side, they share a common gap, just like the first three did. Thread a 5th ring through that gap:
-----------------
The weave should be starting to stabilize now. Now rotate the weave and scrunch it up like this next picture. Pay attention to the first few rings on the left, they're your landmarks. Make sure the angles at which they go through the other rings match the ones in the picture.
-----------------
Now, see that gap above the first ring, in the middle of the weave? Thread a ring through on top there. It should look like this:
-----------------
Here's a more clear view, which also shows the layout of all the other rings nicely as well. This is a good time to compare again and double-check everything. If you got it right, then you're putting in parallel rings from here on!. Also remember that from here on, each ring you put in will be threading through four (4) rings. Did I mention four? Count carefully.
-----------------
Now cut a bunch of 16gauge rings. As I said before, use 9/32" if you don't mind the weave being really tight at first. Otherwise use 5/16", because those will still work.
-----------------
Now for every step from here on, make sure the positions of the first ring and its parallel are matched with the ones in the pictures. Make sure the first parallel is on top of the original ring, then thread a thin ring in front of the original second ring, going through the last four rings:
-----------------
Now thread a ring under the original third ring. Remember to match the positions of the first ring and its parallel.
-----------------
Now thread a ring under the original fourth ring:
-----------------
Now in this next one, notice the positions of the first ring and its parallel. The first parallel is still on top of the first original ring. From here, thread a ring behind the original fifth ring:
-----------------
And that, ladies and gentlemen, is a complete section of the weave. From here on out, you're just matching parallels, and making sure you thread through four rings every time. To make sure you got the weave right, examine the weave while you rotate it. Each sequential row of parallels should slant in alternating directions.
If you have questions, feel free to ask in the forum or by PMing me, and I'll try to give you answers. Enjoy the weave!
Original URL: http://www.mailleartisans.org/articles/articledisplay.php?key=513
