
Submitted ByEdit Dates
Date Uploaded: February 22, 2017, 2:21 am Last Edited: March 19, 2018, 5:11 pm |
Three Quarters Persian Base 6 Flower and
(Flowers Sheet) Article Tags[ Persian ] [ Unit Weaves ] [ Weave Tutorials ] |
 Add to Add toSite Favourites Print this Article |
Three Quarters Persian Base 6 Flower and
(Flowers Sheet)
Article © MAIL User: Grace
This tutorial shows how to make the Three Quarters Persian Base 6 Flower
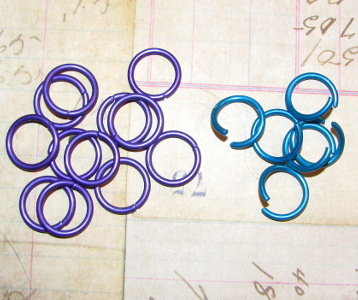

Step 1 (Left photo)
Start with 12 closed rings (Purple) and 6 open rings (blue).
Step 2 (Right photo)
Create a 4n1 unit
Step 3 (Left photo)
Put 2 purple rings on an open blue ring.
Fold the 4n1 unit so 2 of the purple rings touch the side, and the 2 other purple rings flank the outside of the lower purple rings on the outside of the blue ring and float in the middle of the blue ring.
Step 4 (Center photo)
Split the 2 bottom purple rings, and slide the open blue ring (with 2 purple on it) through the split out one purple ring through the top 2 floating purple rings, then back around through the the other bottom purple ring.
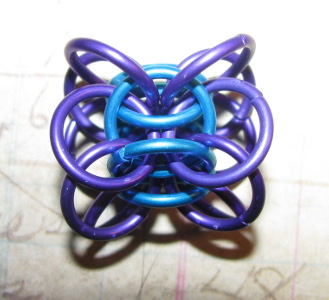
Step 5 (Right photo)
Close the blue ring. The unit should look like this when complete.


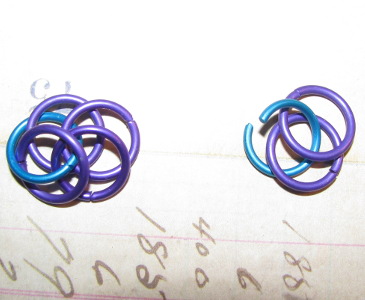
Step 6 (left photo)
Continue to add rings to the weave like this until you use up all 18 rings up. It should look like this.
Step 7 (Center photo)
Open the end blue ring.
Step 8 (Right photo)
Flip the weave over
Step 9
Connect the open blue ring onto the 2 end purple rings to start to complete the loop.

Tip: if you are having difficulty connecting the next 2 rings try taking some thin binding wire and looping it through the blue rings forcing them into position, to create a more accessible opening for the purple rings to pass.


Step 10 (left photo)
Open one of the purple rings to the right of the last connected blue ring, and run it between the left 2 purple rings, and up through the left blue ring. Close the purple ring.
Step 11 (Right photo)
Open one of the purple rings to the right of the last connected blue ring, and run it between the left 2 purple rings, and up through the left blue ring. Close the purple ring.
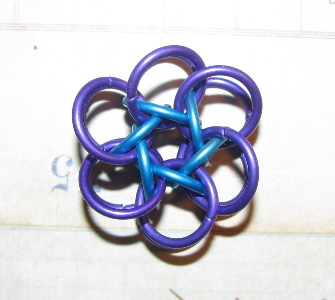
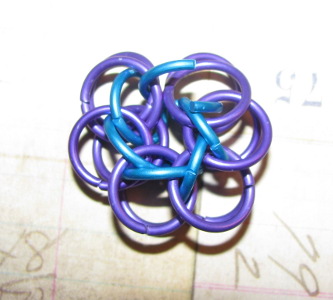
The finished Three Quarters Persian Base 6 Flower will look like this

This is a photo of other variations on the Three Quarters Persian Flower some of these are base 8 or base 10, or use 2 sizes of rings.
Three Quarters Persian base 6 Flower is a little looser (more floppy) than base 8 or 10
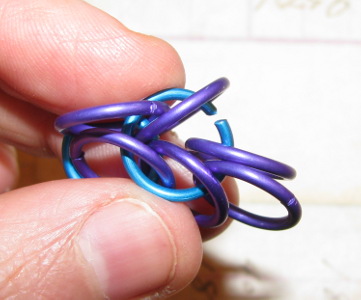
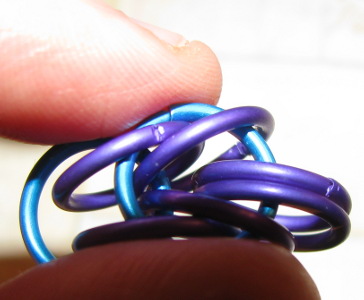
Here is a view of it from the side
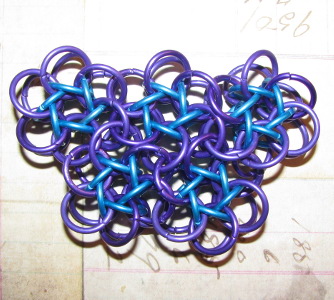
Three Quarters Persian base 6 Flowers sheet Tutorial

Step 12
Make 5 or more Three Quarters Persian base 6 Flower units
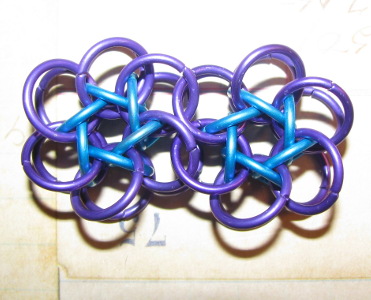
Step 13
Connect 2 flower units on the sides, in 2 consecutive place, Do this on both top and bottom.
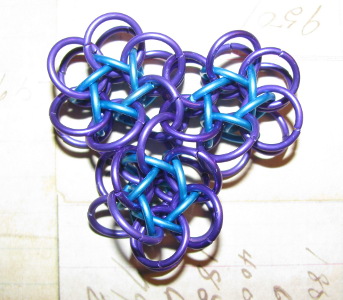
Step 14
Add a 3rd flower unit, by running one purple ring through 2 of the other units connecting points to create a mobius connection. Do this on both the top and bottom of the weave.

Step 15
Connect the 2 rings on either side. Do this on both the top and bottom of the weave.

Step 16
Connect another flower unit on the side, in 2 consecutive place, Do this on both top and bottom.
(make sure that it is added on in a strait line to the first connection.
Step 17
Add a 5th flower unit, by running one purple ring threw 2 of the other units connecting points to create a mobius connection. Do the same to the next connection over, and then connect all other touching sides. Do this on both the top and bottom of the weave.
Original URL: http://www.mailleartisans.org/articles/articledisplay.php?key=772
