
Submitted ByEdit Dates
Date Uploaded: March 12, 2013, 12:37 am Last Edited: May 12, 2015, 7:08 am |
 Add to Add toSite Favourites Print this Article |
Tips on Soldering
Article © MAIL User: djgm
Rings can be soldered in a number of ways. In this article I will provide tips on soldering using a butane torch and sheet solder.
I use what is commonly known as a hobby torch. There are many on the market. The model I use is called the Stingray and manufactured by Blazer. It's essential to use triple refined butane, nothing less will do. These smaller butane torches are well suited for soldering one ring at a time. They will work consistently for non ferrous wire 16swg to 24awg with some practice and good spectacles. They are not designed to be left on for extended periods of time.
When selecting a ring size for a soldered project it is important to realize the rings will shrink when heated. You might find that nice tight AR you worked out with practice aluminum proves unmanageable after the ring has settled on its new size. The longer the ring is red hot the smaller it will become. Take care to only apply heat until the solder has flowed and not longer.
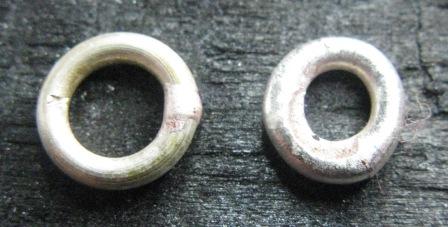
Sheet solder gives excellent results with minimal excess solder bulking up the ring. Cut a small square of solder and slip it in the slit where the ring ends meet. Drip liquid flux on the solder point. Apply some heat over the entire piece to begin and last of all the solder point. The flame will activate the flux quickly and you want the solder to melt at more or less the same moment. The ring doesn't have to be flat but should be as close to your charcoal block as possible. The charcoal serves to reflect heat. The solder will flow up an incline if you lead it by heating the high end more but not exclusively. When you see the solder is melting pass the flame back and forth across the solder point to ensure coverage on both sides.
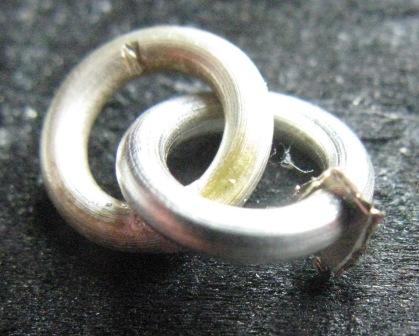
When you are finished, clean and polish your piece.
I use what is commonly known as a hobby torch. There are many on the market. The model I use is called the Stingray and manufactured by Blazer. It's essential to use triple refined butane, nothing less will do. These smaller butane torches are well suited for soldering one ring at a time. They will work consistently for non ferrous wire 16swg to 24awg with some practice and good spectacles. They are not designed to be left on for extended periods of time.
When selecting a ring size for a soldered project it is important to realize the rings will shrink when heated. You might find that nice tight AR you worked out with practice aluminum proves unmanageable after the ring has settled on its new size. The longer the ring is red hot the smaller it will become. Take care to only apply heat until the solder has flowed and not longer.
Sheet solder gives excellent results with minimal excess solder bulking up the ring. Cut a small square of solder and slip it in the slit where the ring ends meet. Drip liquid flux on the solder point. Apply some heat over the entire piece to begin and last of all the solder point. The flame will activate the flux quickly and you want the solder to melt at more or less the same moment. The ring doesn't have to be flat but should be as close to your charcoal block as possible. The charcoal serves to reflect heat. The solder will flow up an incline if you lead it by heating the high end more but not exclusively. When you see the solder is melting pass the flame back and forth across the solder point to ensure coverage on both sides.
When you are finished, clean and polish your piece.
Original URL: http://www.mailleartisans.org/articles/articledisplay.php?key=650
