
Submitted ByEdit Dates
Date Uploaded: December 18, 2010, 5:04 pm Last Edited: January 4, 2013, 10:21 am |
 Add to Add toSite Favourites Print this Article |
Orc Weave
(Unit by Unit)
Article © MAIL User: lorraine
This tutorial shows you how to construct Orc Weave unit by unit, as opposed to in a continuous strip. I find it easier to keep track of the weave this way. Maybe you will too. The rings used are 16awg(1.29mm)/4.75mm rings with an AR of 3.8. I like to use slightly larger rings than the weave calls for so that the folded rings don’t overlap, but instead just barely touch (like in Byzantine).
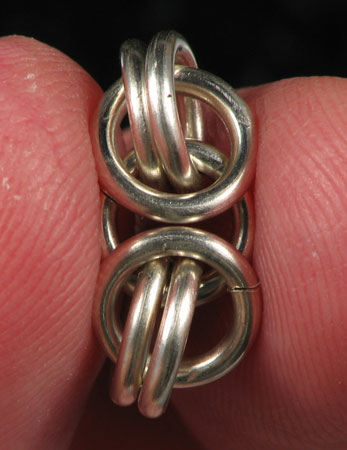
Step 1. Make a 1-2-1-2-1 chain.
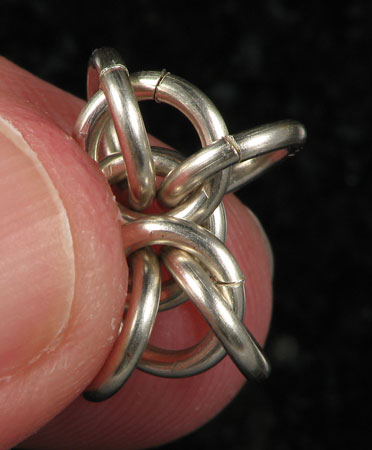
Step2. Fold each single ring on the ends of the chain into the middle.
Step 3. Separate the double rings at the top and bottom by pushing them to the sides.
Step 4. Add a ring on each side, to the pairs you pushed to the sides.
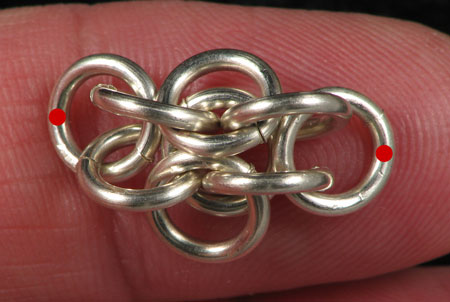
Step 5. Turn your work over to the other side. Then flip the two rings added to each side to the middle.
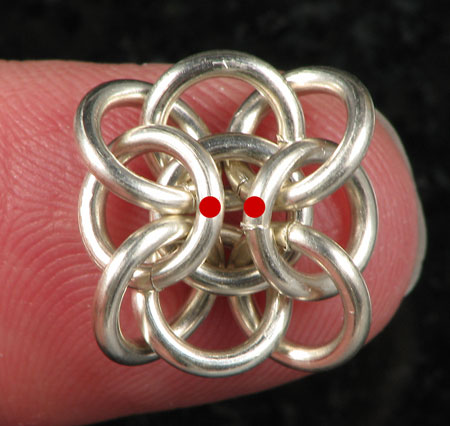
Step 6. You will now start adding four "corner" rings to the unit, through the eyes marked in green.

Step 7. Continue adding the corner rings.
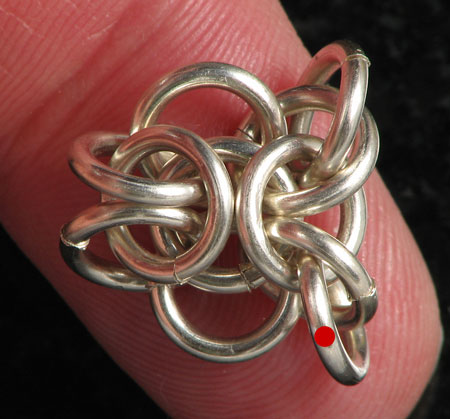

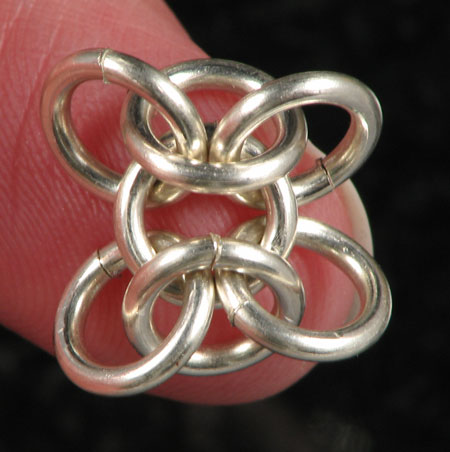
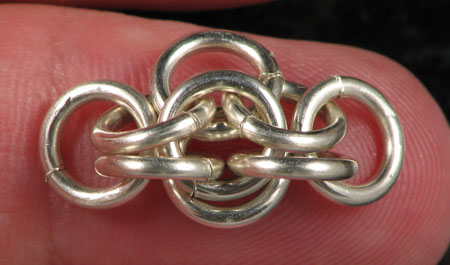
Step 8. This is a finished unit of Orc Weave, looking at the top of the weave. Notice that the folded-in rings face each other left/right. This is top-side up.
Step 9. Turn your work over. Notice that the folded-in rings face each other top/bottom. This is bottom-side up.
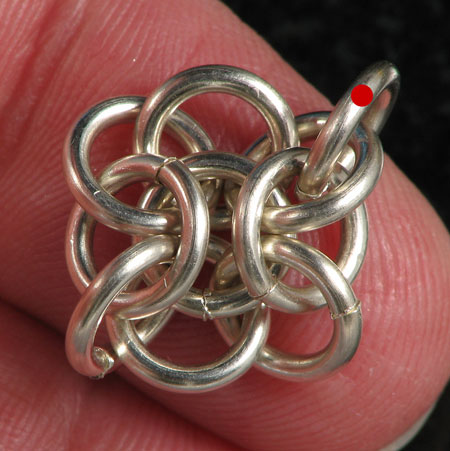
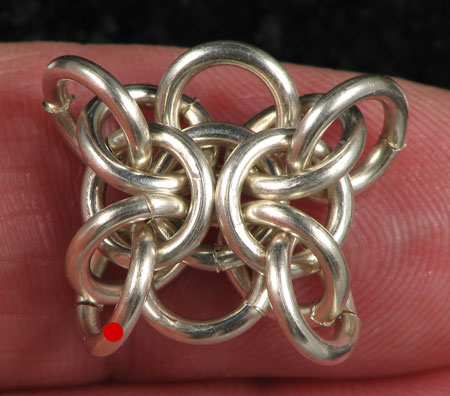
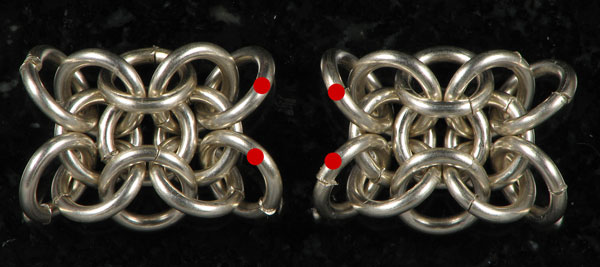
Step 10. Make another unit of Orc Weave. Place them side-by-side, bottom-side up. The units are joined by a single ring, threaded through the four rings marked in red.
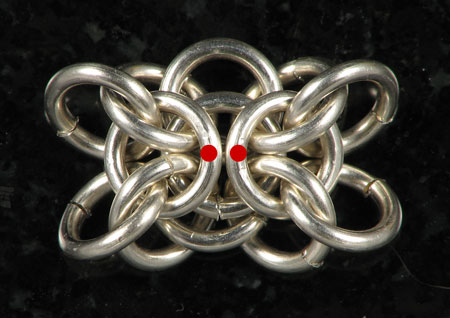
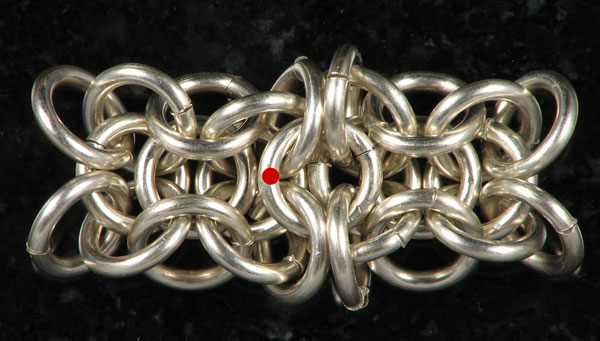
Step 11. Thread the joining ring through and close. This is the two units joined together, looking bottom-side up. The joining ring is marked in red.
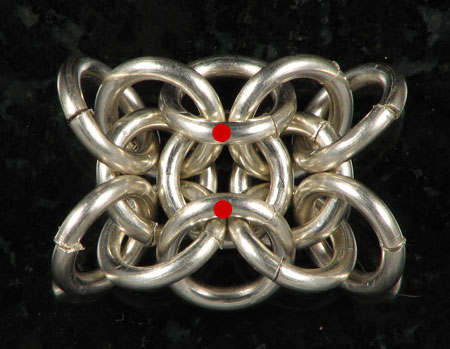
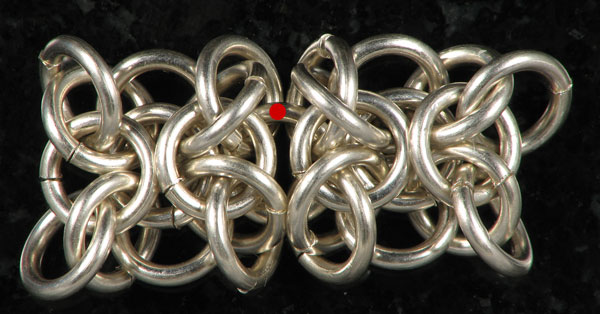
Step 13. Turn your work over. This is the two units joined together, top-side up. Again, the joining ring is marked in red.
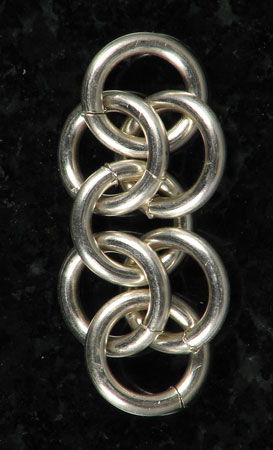
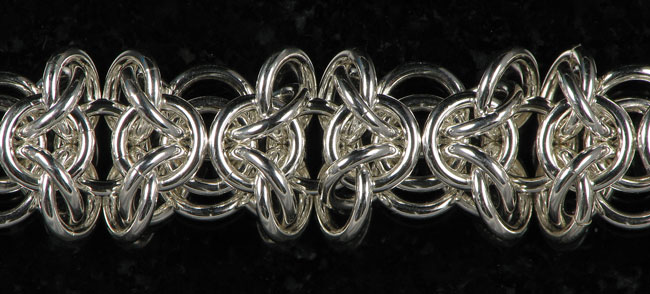
Step 14. Keep joining units of Orc Weave together until you have the length you want. Here is a picture of some Orc Weave with nice shiny, well cut rings for a change. :)
Happy weaving!
Lorraine
Step 1. Make a 1-2-1-2-1 chain.
Step2. Fold each single ring on the ends of the chain into the middle.
Step 3. Separate the double rings at the top and bottom by pushing them to the sides.
Step 4. Add a ring on each side, to the pairs you pushed to the sides.
Step 5. Turn your work over to the other side. Then flip the two rings added to each side to the middle.
Step 6. You will now start adding four "corner" rings to the unit, through the eyes marked in green.
Step 7. Continue adding the corner rings.
Step 8. This is a finished unit of Orc Weave, looking at the top of the weave. Notice that the folded-in rings face each other left/right. This is top-side up.
Step 9. Turn your work over. Notice that the folded-in rings face each other top/bottom. This is bottom-side up.
Step 10. Make another unit of Orc Weave. Place them side-by-side, bottom-side up. The units are joined by a single ring, threaded through the four rings marked in red.
Step 11. Thread the joining ring through and close. This is the two units joined together, looking bottom-side up. The joining ring is marked in red.
Step 13. Turn your work over. This is the two units joined together, top-side up. Again, the joining ring is marked in red.
Step 14. Keep joining units of Orc Weave together until you have the length you want. Here is a picture of some Orc Weave with nice shiny, well cut rings for a change. :)
Happy weaving!
Lorraine
Original URL: http://www.mailleartisans.org/articles/articledisplay.php?key=607
