
Submitted ByEdit Dates
Date Uploaded: September 8, 2007, 9:28 pm Last Edited: December 9, 2012, 6:36 pm |
 Add to Add toSite Favourites Print this Article |
Making a 'Ring Jig'
(W.I.R.E.)
Article © MAIL User: anon
(This article has been flagged for exporting to W.I.R.E., once a home is available. -- Ed.)
This is a simple tutorial for making a 'Ring Jig' for making
Turk's Head Knot Rings. There may be better ways,
there are certainly people with more talent, and if you
are interested in seeing some better examples of Turk's
Head Knot Rings I strongly suggest you go to
www.golden-knots.com
Loren's work is amazing.
Please note, so far I've only made 5 rings, so my experience
is limited, I may be wrong with some of my statements, if so
please let me know so I can correct them. thanks! That being
said each ring has taught me a lot and so my technique has
been constantly evolving.
To make a ring jig you will need the following ...
Wooden Dowel (about 20-30cm long) with a diameter the same
or slightly smaller than the finger the ring is for.
Paper
Scissors
Pen
Ruler
Sticky tape
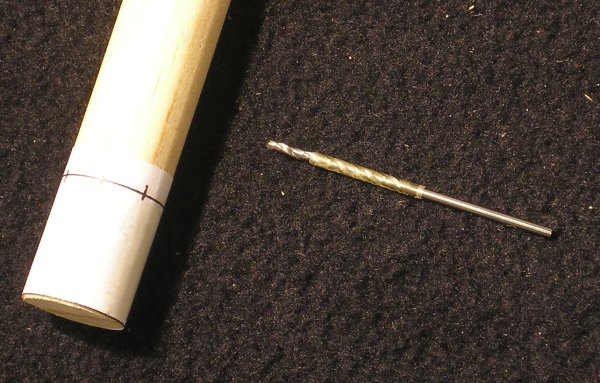
Electric drill
1.5mm Drill
20 cm of 1.5mm thick Galvy Wire (other stiff wire will do,
but if it is a different diameter the drill size will need
to match.
Wire Cutter
Marker pen
Blu-tack
For this tutorial we will make a jig for a 3 lead, 7 bight ring,
to create other rings you will need to create other jigs, but
the principles remain the same, just the number and position
of the holes will vary. (If there is demand I will make a tutorial
covering some of the variations.)
Cut a strip of paper 1 inch wide and slightly longer than the
diameter of the dowel.
Wrap it tightly around the dowel and mark where the paper
overlaps, the unwrap the paper from the dowel.
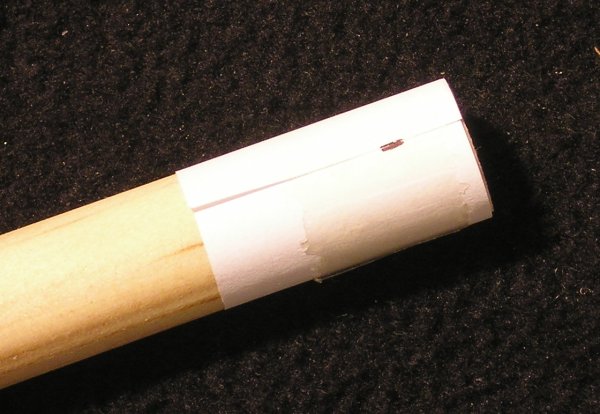
Measure the distance from the overlap mark to the end of
the paper (this gives the circumference of the dowel)
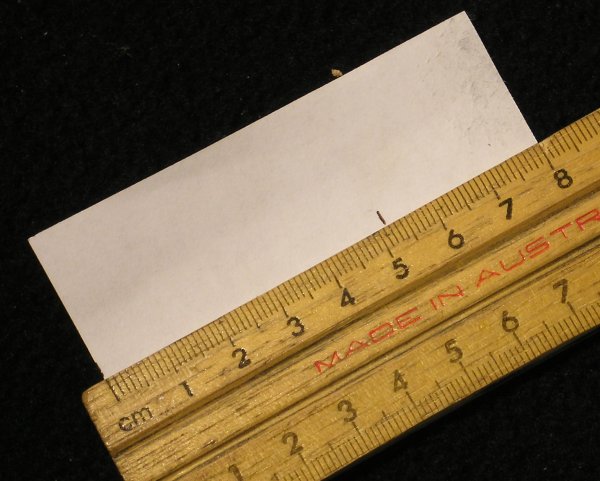
Draw two parallel lines 2cm apart on a sheet of paper and
then mark out the measurement of the dowel's circumference
along one of the lines, divide this distance by 7 (1 for each bight)
and mark each point.
On another part of the paper do the same, but with the
parallel lines 1cm apart (you can vary this size to adjust the
width of the ring).

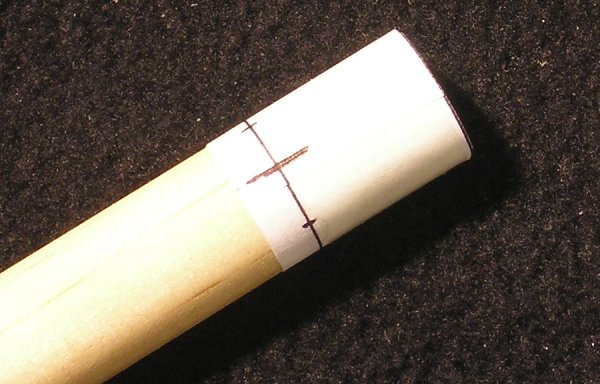
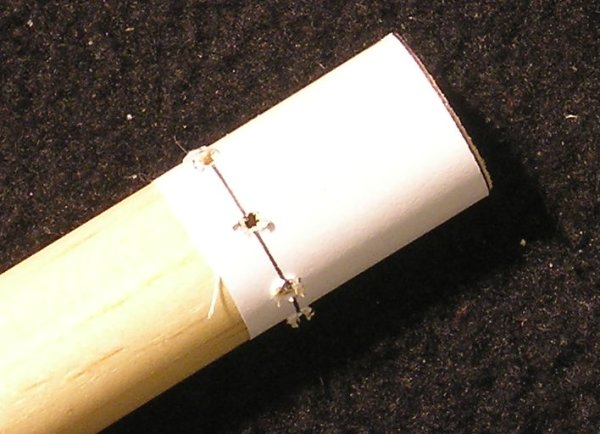
Cut out the two patterns as shown.
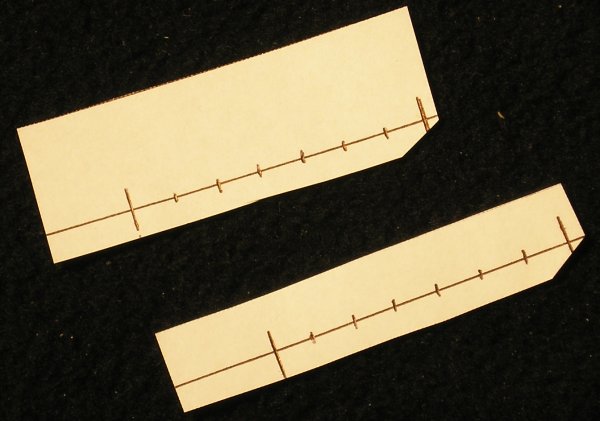
Tape one end of the 2cm pattern to the dowel

Wrap the first pattern around the dowel so that the first and
last marks overlap and tape into place.
Wrap some tape around the drill 1/3 of the thickness of the
dowel from the tip of the drill.
Drill into the dowel at each mark to the depth of the tape,
then remove the pattern.
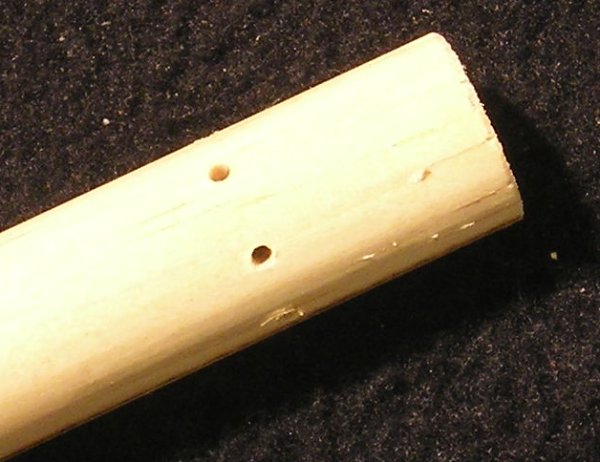
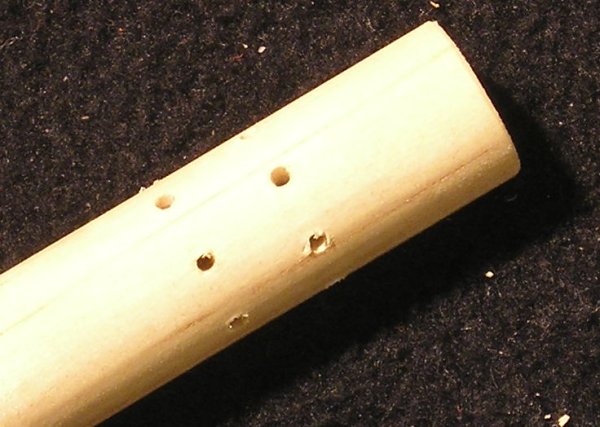
(you should now have a ring of 7 holes around the dowel.)
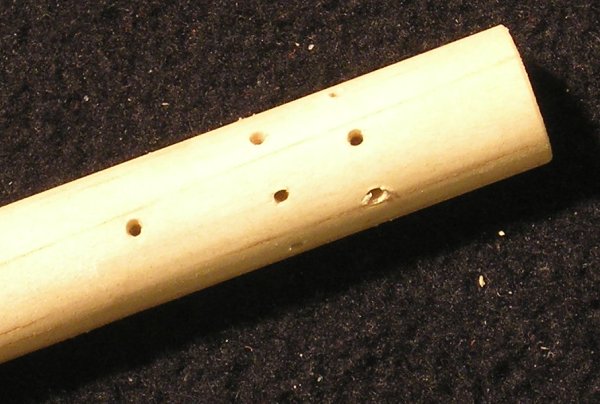
Wrap the second pattern around the dowel so the line
passes just below the first set of holes, and that the marks
are between the holes (but about 1 cm lower)
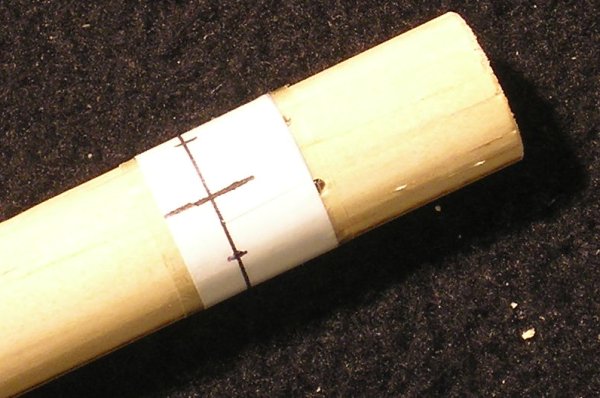
Drill into the dowel at each mark to the depth of the tape,
and remove the pattern.
Drill a hole about 2 cm below the two rings of holes,
this is where the wire for the ring will be anchored before
you start making the ring.
Put a small ball of Blu-tack on the end of the 1.5mm wire,
(This is to prevent the wire from slipping out while you are
making the ring),
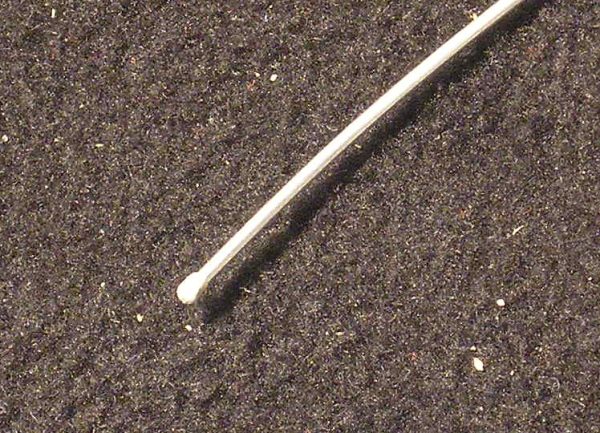
push the wire into a hole
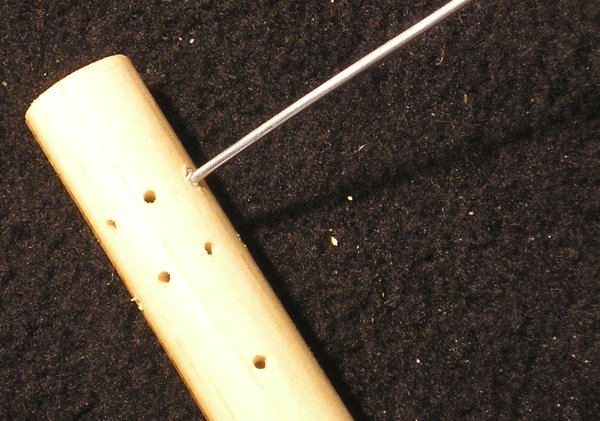
and cut the wire about 5mm away from the dowel.
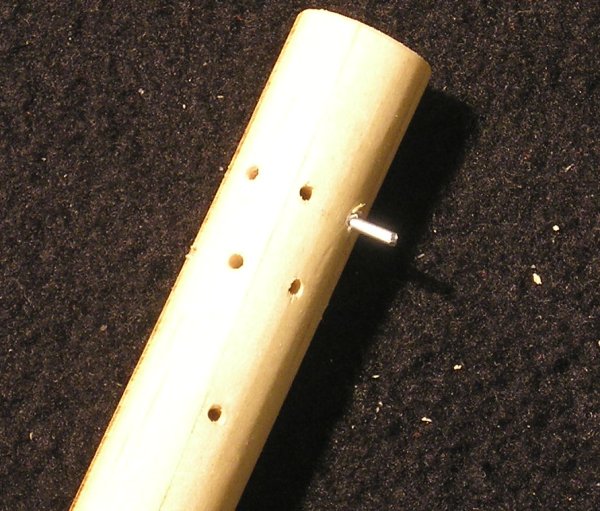
Repeat for the other holes, (except the anchor hole, cut the
wire for that hole 1cm away from the dowel)
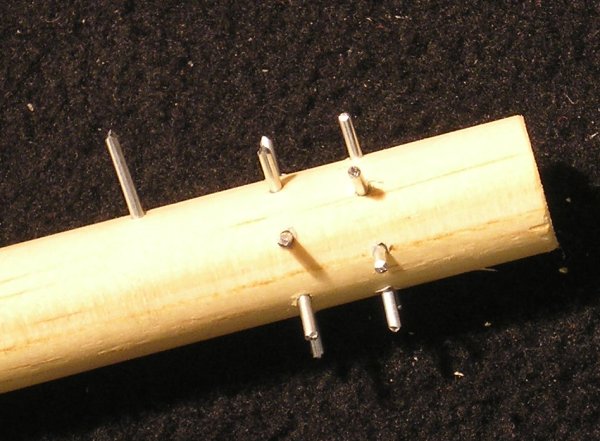
There you have your completed ring jig, the next step is to
create your own knot ring ...
(hopefully I'll have a tutorial to cover that soon too. Until then
you can see the thread in which i discuss making my
first knot ring. unfortunately due to the advances in how
I make rings some of that information is obsolete.
Any questions or comments please use http://www.mailleartisans.org//board/viewtopic.php?t=9587
This is a simple tutorial for making a 'Ring Jig' for making
Turk's Head Knot Rings. There may be better ways,
there are certainly people with more talent, and if you
are interested in seeing some better examples of Turk's
Head Knot Rings I strongly suggest you go to
www.golden-knots.com
Loren's work is amazing.
Please note, so far I've only made 5 rings, so my experience
is limited, I may be wrong with some of my statements, if so
please let me know so I can correct them. thanks! That being
said each ring has taught me a lot and so my technique has
been constantly evolving.
To make a ring jig you will need the following ...
Wooden Dowel (about 20-30cm long) with a diameter the same
or slightly smaller than the finger the ring is for.
Paper
Scissors
Pen
Ruler
Sticky tape
Electric drill
1.5mm Drill
20 cm of 1.5mm thick Galvy Wire (other stiff wire will do,
but if it is a different diameter the drill size will need
to match.
Wire Cutter
Marker pen
Blu-tack
For this tutorial we will make a jig for a 3 lead, 7 bight ring,
to create other rings you will need to create other jigs, but
the principles remain the same, just the number and position
of the holes will vary. (If there is demand I will make a tutorial
covering some of the variations.)
Cut a strip of paper 1 inch wide and slightly longer than the
diameter of the dowel.
Wrap it tightly around the dowel and mark where the paper
overlaps, the unwrap the paper from the dowel.
Measure the distance from the overlap mark to the end of
the paper (this gives the circumference of the dowel)
Draw two parallel lines 2cm apart on a sheet of paper and
then mark out the measurement of the dowel's circumference
along one of the lines, divide this distance by 7 (1 for each bight)
and mark each point.
On another part of the paper do the same, but with the
parallel lines 1cm apart (you can vary this size to adjust the
width of the ring).
Cut out the two patterns as shown.
Tape one end of the 2cm pattern to the dowel
Wrap the first pattern around the dowel so that the first and
last marks overlap and tape into place.
Wrap some tape around the drill 1/3 of the thickness of the
dowel from the tip of the drill.
Drill into the dowel at each mark to the depth of the tape,
then remove the pattern.
(you should now have a ring of 7 holes around the dowel.)
Wrap the second pattern around the dowel so the line
passes just below the first set of holes, and that the marks
are between the holes (but about 1 cm lower)
Drill into the dowel at each mark to the depth of the tape,
and remove the pattern.
Drill a hole about 2 cm below the two rings of holes,
this is where the wire for the ring will be anchored before
you start making the ring.
Put a small ball of Blu-tack on the end of the 1.5mm wire,
(This is to prevent the wire from slipping out while you are
making the ring),
push the wire into a hole
and cut the wire about 5mm away from the dowel.
Repeat for the other holes, (except the anchor hole, cut the
wire for that hole 1cm away from the dowel)
There you have your completed ring jig, the next step is to
create your own knot ring ...
(hopefully I'll have a tutorial to cover that soon too. Until then
you can see the thread in which i discuss making my
first knot ring. unfortunately due to the advances in how
I make rings some of that information is obsolete.
Any questions or comments please use http://www.mailleartisans.org//board/viewtopic.php?t=9587
Original URL: http://www.mailleartisans.org/articles/articledisplay.php?key=436
